.webp)
Clash of Clans and the Queen Charge Problem: How to Control the Archer Queen’s Path

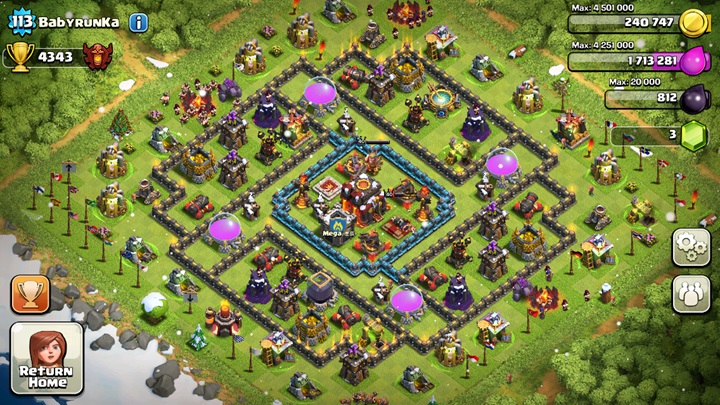
A Queen Charge can look effortless in a replay: the Archer Queen enters from one side, removes key defenses, and opens a clean route for the main army. Yet the same attack can unravel when she walks along the outside of the base, attacks an unexpected wall, or turns away from the compartment the attacker intended her to enter. This is not merely an issue of having a high level Queen or choosing the latest army combination. It is a planning problem: the attacker must shape the Queen’s available choices before deploying her.
This article examines one specific challenge in Clash of Clans: controlling the Archer Queen’s route during a Queen Charge. The focus is not on prescribing one fixed army for every Town Hall level. Instead, it explains how to read a base, shape a route, diagnose a bad turn, and learn from the attack. Those principles matter because exact troop levels, Hero Equipment, defenses, and balance can change over time, while the basic challenge of directing a Hero through a compartmented base remains.
Understanding the Queen Charge Before the Attack
A Queen Charge is more than a Queen Walk with spells. In a walk, the Archer Queen usually attacks from outside the base or works along its edge. In a charge, the attacker intends for her to move into the base and accomplish a defined task there. That task might be removing a major defense, drawing out defending Clan Castle troops, opening a safe corridor, or clearing buildings that would otherwise pull the main force off course. Supercell describes the Queen Charge as a way to lure Clan Castle troops and create a path for a follow up force in a Miner and Hog attack, illustrating that the Queen’s value can include both destruction and route preparation.
The route is therefore the actual objective. A Queen who survives for a long time but spends that time clearing harmless buildings on the edge may contribute less than a Queen who removes one strategically important defense and creates a predictable funnel. Before attacking, describe her job in one sentence. For example, “The Queen enters from the western corner, removes the defending Clan Castle troops, and opens the first compartment for the main army.” If the job cannot be described clearly, the entry point and spell plan are probably not ready.
That sentence also helps distinguish a Queen Charge failure from an attack failure more generally. If the Queen completes her assigned task but the main army later splits, the charge may have succeeded. If she never reaches the assigned area, the route design failed even if she survives. This distinction is useful because it prevents players from changing the entire army after every unsuccessful raid. Diagnose the part of the plan that actually broke.
Reading the Base Before Choosing an Entry
Begin by locating the destination, not by choosing the side that looks easiest to deploy from. Mark the defense, compartment, or defending troops that the Queen must reach. Then trace backward from that destination to a plausible entry point. The route needs a reason to continue inward after the first building falls. If every nearby target points the Queen back toward the perimeter, a single deployment at the edge is unlikely to produce the intended path.
Look at the buildings around the intended route as a connected pattern. The Queen may finish one target and then face several possible next targets. The visible shortest line on the screen is not a dependable promise about which building she will attack next. Supercell has noted that it adjusted the Archer Queen’s attack position evaluation logic to improve her AI, including making her more likely to walk into open compartments with a missing corner wall segment. That note shows that target positioning is a real part of the game’s behavior, but it does not give players a complete formula for predicting every decision. The practical lesson is to plan for plausible alternatives rather than assuming a perfect straight line.
Now identify the buildings that could pull her away from the goal. An outside collector, builder hut, or other exposed building can appear unimportant, but if it becomes a tempting next target, it may send the Queen around the base instead of through it. Mark three things during the scout: the intended entry, the intended destination, and the nearest competing targets. If you cannot explain why the intended route should remain attractive after each building is destroyed, the path is not yet controlled.
Designing the Funnel Before Deploying the Queen
The funnel is the part of the plan that removes unwanted choices. It does not mean destroying every building outside the base. It means clearing enough of the nearby alternatives that the Queen has a more useful direction to take when she is ready to move on. A common mistake is to deploy the Queen first and hope the rest of the attack will shape her route afterward. By then, she may already have committed to a target that carries her away from the intended entry.
Think in terms of a left boundary and a right boundary. The Queen should have a limited corridor, not an open invitation to travel along the whole base. If an outside building on one side can draw her away, clear it or choose a different entry. If the nearest buildings on both sides pull her outward, the entry may be poorly positioned. This does not require an elaborate setup every time. Sometimes a small amount of preliminary clearing is enough. The question is whether that clearing changes the likely next choice.
Funneling has a second job: it protects the main army’s route. Supercell’s own strategy overview describes a Queen Charge as being funnelled to draw out Clan Castle troops and create a path for Miners and Hogs. That is a useful model even when the follow up army is different. The Queen is not simply a powerful unit at the start of an attack. She is one part of a sequence that shapes what the next troops will do.
Choosing the Entry and Preparing the Wall
Choose an entry where the Queen can begin doing useful work before she faces the hardest part of the route. If the first targets are low value and the Queen must cross a long exposed stretch to reach the compartment, the charge may consume time and support before it achieves anything. Compare two candidate entries by asking which one gives her a productive first target, which one offers a plausible route to the objective, and which one leaves fewer dangerous alternatives.
A wall opening should support the route you have already designed. It cannot repair a poor funnel by itself. If the Queen has an attractive target outside the opening, creating a breach nearby does not guarantee that she will enter. Likewise, a wall opening may be useful even when it is not the shortest route, provided that the path on the other side offers a meaningful sequence of targets. Treat the opening as an invitation, not a command.
A good pre attack check is to trace the first three likely steps. Where does the Queen begin? What target is available after her first target falls? What target is available after that? The trace does not need to predict every later decision. It needs to reveal obvious traps. If the second step leads away from the opening, adjust the funnel or entry before spending the attack. This small planning habit can prevent the familiar disappointment of seeing the Queen clear the outside while the intended compartment remains untouched.
Starting the Charge and Watching the First Targets
When the attack begins, deploy the Queen at the point you selected and observe her first target rather than immediately deploying every troop. This short pause is not wasted time. It gives you information about whether the base behaves as expected. If she chooses the wrong first building, a later spell or wall opening may not solve the underlying route problem. The earlier you recognize a bad start, the more options remain.
Deploy support with a specific purpose. Ask whether it is meant to protect the Queen, remove an unwanted building, help create the funnel, or deal with a threat that would otherwise force a response. Avoid dropping support just because it is part of a memorized sequence. The sequence should respond to the base. If a support troop clears an outside building, watch whether that actually changes the Queen’s next available route. If it does not, the problem may lie elsewhere.
Pay close attention to the transition after a target falls. Many route failures happen not while the Queen is attacking a building, but in the moment she selects what to do next. Her movement toward the next target reveals whether your funnel is working. If she moves toward the compartment, the route remains viable. If she turns outward, decide whether the attack can still achieve its purpose or whether you should immediately adapt the rest of the plan.
Managing Survival Without Losing the Route
A Queen Charge requires a balance between keeping the Queen alive and preserving the purpose of the charge. A spell can give her time to finish a valuable task, but using resources to sustain a route that has already failed may only make the mistake more expensive. Before spending a major defensive resource, ask whether the Queen is still moving toward a useful target, whether the spell changes her chance of completing the objective, and whether the remaining army needs that resource later.
Healers are central to many Queen Charge plans, but their behavior should be observed rather than assumed. Supercell has published updates addressing Healer targeting, including adjustments intended to make Healers more consistent in choosing damaged units and a later fix for a bug that caused them to change targets unexpectedly. These changes are reminders that support behavior can be affected by game updates and by the situation during the attack. Do not build a plan around the assumption that healing will always behave in precisely the way it did in an old replay.
Survival also depends on the route’s exposure. A Queen who enters deeply may face more concentrated damage, but she may also remove threats that would be dangerous to the main army. A Queen who stays outside may live longer while failing to open the base. Consider the trade: how much value does the next compartment offer, and what will be left to support her after she enters? The aim is not to keep the Queen at full health. It is to spend her health and support efficiently in exchange for meaningful progress.
Responding When the Queen Turns the Wrong Way
When the Queen turns away from the intended route, do not instantly label the decision random or assume that a game bug caused it. First reconstruct what she could see at that moment. Which buildings remained? Which target had just been destroyed? Was the route blocked, unattractive, or simply less compelling than a nearby alternative? Supercell has made changes to Queen positioning logic, which confirms that her attack position is something the game evaluates. But no player should treat an intended route as guaranteed just because it looks obvious from the map.
Next, decide whether the new path has any value. If the Queen is clearing buildings that help the main army move toward the core, the detour may be acceptable. If she is moving away from the objective and the main force now lacks the support the plan depended on, adapt the attack. The follow up troops may need a different entry, or a spell reserved for the Queen may be better spent elsewhere. The key is to respond to the base as it now exists, rather than continuing a plan whose assumptions have disappeared.
After the raid, distinguish between a pathing mistake and a timing mistake. A pathing mistake means the Queen chose an unwanted direction because the entry and funnel allowed it. A timing mistake means she was on a useful route but support arrived too late, a threat was not handled promptly, or the next force was deployed before the charge had created a suitable corridor. These failures look similar in the final result, but they require different corrections. Changing the entry will not fix a late support deployment, and adding another spell will not fix a funnel that points outward.
Connecting the Charge to the Main Army
The Queen’s route should be planned together with the main army’s route. Decide which buildings the Queen is expected to remove and which targets the main force should attack afterward. The charge may remove a side of the base to narrow the main army’s choices, pull defending Clan Castle troops away from the main force, or clear a defense that would otherwise interfere with the follow up. If the Queen clears the same low value area the main force was already going to clear, she may have spent time without changing the attack’s structure.
Plan a clear handoff point. The Queen does not necessarily have to finish her entire route before the main army begins. However, the moment the main force is deployed should make sense in relation to what the Queen has accomplished. Has she removed enough buildings to shape the funnel? Has she drawn out a threat that needed to be handled separately? Has she reached the area that makes the intended main path plausible? The answer will differ by base and army, so a fixed deployment timer is less useful than a visible strategic condition.
This relationship also explains why a Queen Charge can be successful even if the Queen eventually falls. If she has already opened the intended lane, removed a key threat, and enabled the main army to reach its targets, her contribution may be complete. Conversely, keeping her alive while she circles the perimeter may not rescue the plan. Judge the charge by the job it completed and the path it created, not by survival alone.
Practicing the Route and Reviewing Replays
Practice one route problem at a time. Use friendly challenges or repeatable practice opportunities to test a specific question: does clearing this building change the Queen’s next turn, does a different entry make the compartment more attractive, or does the wall opening need to be placed elsewhere? Supercell recommends learning strategies through practice and presents the Queen Charge as a method for creating a path for a follow up force. That supports a deliberate approach: test the route itself instead of changing several army elements at once.
After each attempt, review the replay at the moment the route changed. Write down the Queen’s starting point, her first targets, the moment she chose a different direction, and what targets were available then. Also note whether the funneling troops had finished their work and whether the main army was deployed at the intended handoff. This turns “the Queen went the wrong way” into a specific observation, such as “after clearing the outer building, she chose the perimeter target because the opening had no nearby cleared approach.”
Change only one major variable in the next test. If you change the entry, funnel, troop support, and spell timing all at once, you may get a better result without learning why. A useful comparison keeps the army and spell plan stable while changing one route decision. Over several attacks, you will build a practical record of what works against the kinds of layouts you encounter. The aim is not to discover a perfect universal formula. It is to improve your ability to read the base and make a deliberate adjustment.
Building a Reliable Queen Charge Habit
A reliable charge begins before troop deployment. Name the objective, choose an entry that gives the Queen a productive first target, identify the buildings that could pull her away, and decide what must be true before the main force begins. Then observe the Queen’s first targets and adjust when the route changes. This process replaces hope with a sequence of decisions that can be reviewed and improved.
It is equally important to know when not to force a Queen Charge. If the base offers no sensible entry, the Queen would need too much support to reach a modest objective, or the planned main army depends on resources that the charge would consume, another attack plan may be safer. A strong player is not someone who uses the same opening on every base. A strong player recognizes when a strategy’s conditions are absent and avoids investing the whole raid in a route that never made sense.
The central lesson is that the Archer Queen’s path is shaped by the targets and openings available around her. The attacker cannot assume that a visually obvious route will be selected, and should not treat every unexpected turn as pure randomness. Read the competing targets, create a useful corridor, observe the transition between targets, and connect the Queen’s work to the main army. That is how a Queen Charge becomes a planned operation rather than a gamble.
Conclusion
The Queen Charge problem in Clash of Clans is fundamentally a problem of route design. Success depends on giving the Archer Queen a useful entry, limiting attractive distractions, managing support according to the route, and ensuring that her work creates value for the main army. When she turns unexpectedly, the replay can reveal whether the cause was a weak funnel, a poor entry, a timing error, or a plan that asked too much of her.
Rather than copying a fixed sequence, build a repeatable method: identify the objective, trace the first few likely targets, shape the funnel, watch the Queen’s opening choices, and review the moment the route changed. That method remains useful even when balance updates alter the exact army details. It turns every attack, successful or not, into information for the next one.